Self-Paced Work: Mad Libs Updates
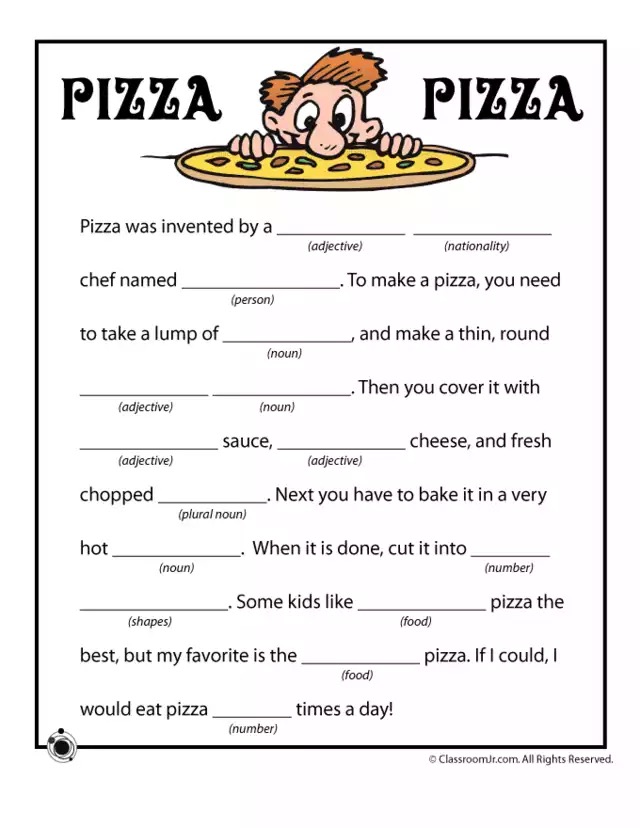
Continue creating the "Pizza" Mad Libs with the next sentence in the story!

To make a pizza, you need to take a lump of ___noun___ and make a thin, round ___adjective___ ___noun___.
Part 1 - Adding Additional Inputs
For the story continue, the first step is to add some additional replacement words. There should be a text box for each one!
- Open the index.html file for editing
- Under the existing
<p>elements for the inputs, above the<p>element for the button, create a new<p></p>element - Within the
<p></p>, add text for the part-of-speech label (e.g.,Noun:) - After that, still within the
<p></p>, add an<input />element - Give the new
<input />a uniqueidattribute value (e.g.,noun1)
Repeat the steps above for each of these new word replacements:
| Part-of-speech | id attribute |
|---|---|
| Noun | noun1 |
| Adjective | adj2 |
| Noun | noun2 |
Each full <p></p> should end up looking something like this (with a different text label and id value):
<p>Adjective: <input id="adj1" /></p>
Part 2 - Receiving the User Input in JavaScript
Next, it's time to grab those values from the text boxes. It will be necessary to pull values for each <input /> element.
- Open the script.js file for editing
- Make a new line in the body of the
madLibsfunction, under the existing value variables - Create a new variable to store the
<input />element (e.g.,noun1Element) - Set the variable to be a call to
document.querySelector() - Pass in the proper selector to select the targeted
<input />based on itsidattribute value - Once the element has been stored, create another new variable on the next line to store the entered text (e.g.,
noun1Value) - Set that variable to be the
valueof the input element variable
Repeat the steps above for each of the new input elements:
id for <input /> |
Element variable | Value variable |
|---|---|---|
noun1 |
noun1Element |
noun1Value |
adj2 |
adj2Element |
adj2Value |
noun2 |
noun2Element |
noun2Value |
Each set of variables should end up looking something like this (with different variable names and a different selector string):
let adjective1Element = document.querySelector("#adjective1");
let adjective1Value = adjective1Element.value;
Part 3 - Displaying the Next Sentence
Now that the values have been retrieved from the text boxes, they can be added to the sentence!
- Open the script.js file for editing
- Find where the
storyvariable is created - Add the full additional sentence to the story
To make a pizza, you need to take a lump of __noun__ and make a thin, round __adjective__ __noun__.
- Replace each blank word with its corresponding variable value
- Use template literal embedded expressions to accomplish this
- E.g., the first noun blank should become
${noun1Value}
Run the program, enter some new words, click the button, and ensure that the next sentence appears!
Part 4 - One More Sentence
Continue the pizza story by adding the next sentence:
Then you cover it with ___adjective___ sauce, ___adjective___ cheese, and fresh chopped ___plural noun___.
Follow these steps for each new replaceable word:
- In the index.html file, create an
<input />element with a uniqueidattribute value - In the script.js file, in the
madLibsfunction, store the<input />element in a variable - Under that, store the text value from the
<input />element in another variable - In the
storyvariable, add the next sentence - Replace the blank word with the text value variable
Once that's done, run the program again, enter some new words, click the button, and ensure that the next sentence appears!
Challenge 1 - Clearing Input
After each time the page displays a story, clear the text the user entered in the inputs.
Challenge 2 - More Mad Libs
Try to create an entirely new Mad Libs story!